EXERCISE #2
Are you ready to have some fun? Exercise #2 is when your work to this point will really start paying dividends!
Prerequisites
To recap, we expect that you have completed all steps in the previous sections, and that you now have:
- a functioning code editor
- a validated installation of R and R Shiny
- an account on shinyapps.io
STEP #1 - Make Exercise #1 interactive
In Exercise #1 you made a static plot and calculated some statistics on the mtcars data set. Your job in this exercise is easy to explain - simply do the same things in R Shiny so that the plot and values show up on a web page.
But then go one step further and create inputs on your page that allow the user to do the following things:
- select the columns of the table to plot on the X and Y axes
- enter values to use as the labels on the X and Y axes
While easy to explain, don’t be hard on yourself if you struggle making these things happen. The reactive elements you need take a bit of work to get the hang of. Please go back repeatedly to your internet Shiny tutorials and documentation and make sure you are understanding that Shiny apps:
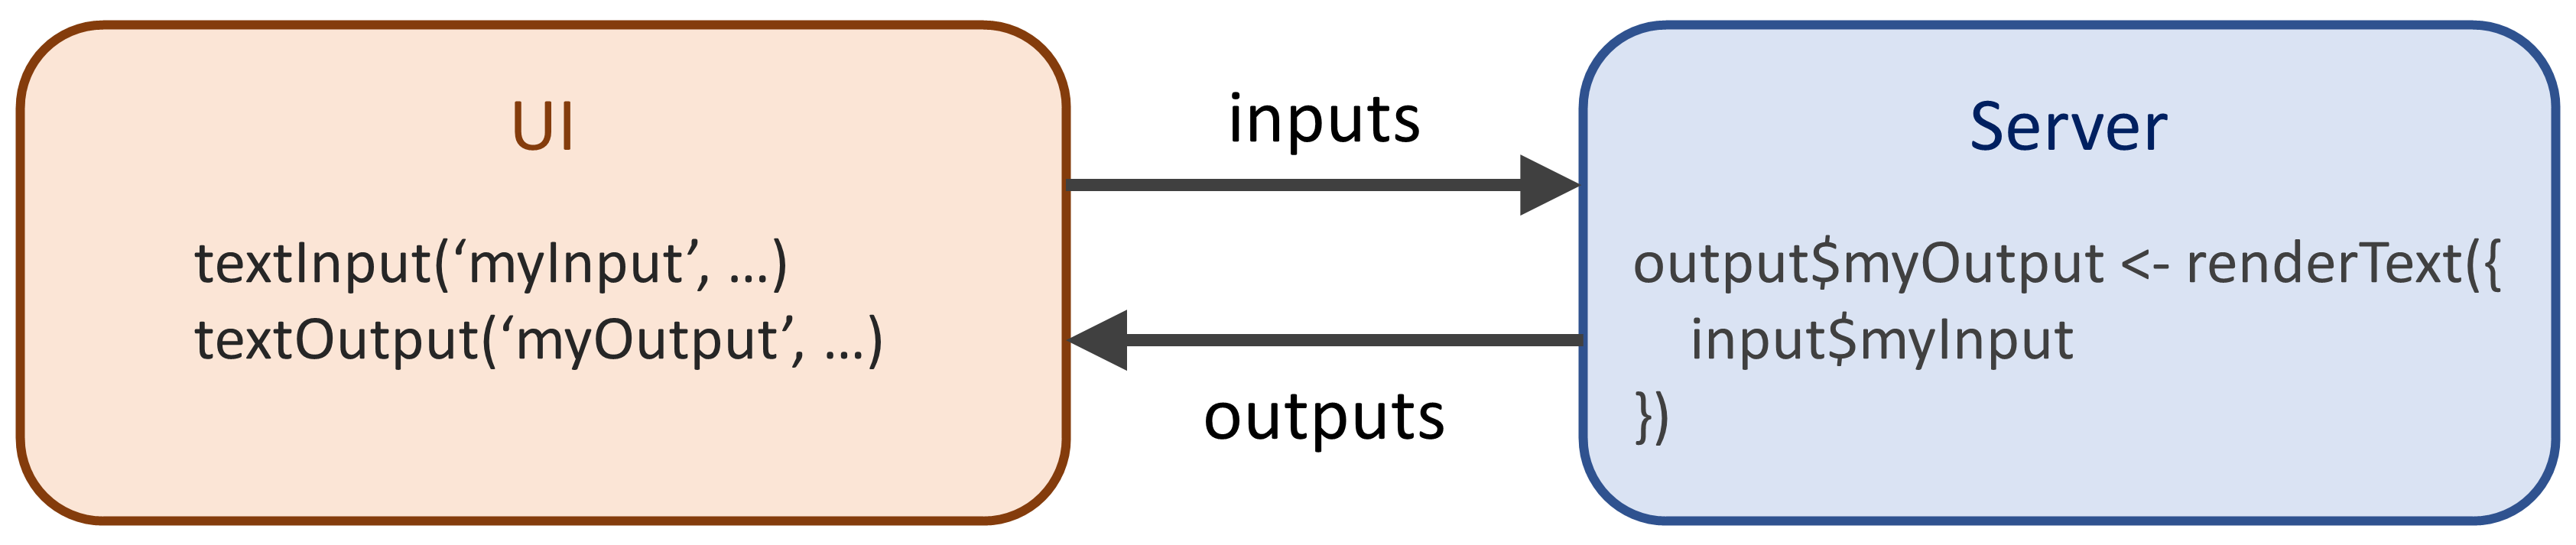
- have two distinct components, a ‘ui’ and a ‘server’
- have ‘inputs’ and ‘outputs’ placed into the UI
- have code in the server that reacts to the inputs to render changes in the outputs
If you are still struggling after a day of reading and trying, send your mentor examples of what you have already tried and the kinds of errors you are getting.
Copying is a great way to get started - make use of the many simple template apps you will find on the internet.
STEP #2 - Add something creative to your app
The point of Shiny is to allow you to expose possibilities to your users. Here’s your chance to think of something to do with your app and data set that we haven’t suggested to you yet. Be creative! This is a very important part of working in the MDI - the ideas for what your tools should do will be your invention!
STEP #3 - Upload and share your app on shinyapps.io
Follow the shinyapps.io documentation to learn how to upload and launch your new app on their public server.
https://shiny.rstudio.com/articles/shinyapps.html
Hint: you will need to install the R package ‘rsconnect’.
STEP #4 - Demonstrate your success
Email your mentor with the link to your app on shinyapps.io.