EXERCISE
Excellent! You are ready to engage in a bit of code collaboration. When you are done, you will see the following values update with your changes:
4 people have successfully completed this exercise as of 2022-05-31.
Prerequisites
To recap, we expect that you have completed all steps in the previous sections, and that you have:
- installed Visual Studio Code
- created a GitHub account
- logged into GitHub from within VS Code
STEP #1 - Fork this repository
As mentioned, MDI Basic Training is a public GitHub repository. Your first step is to fork it into your GitHub account:
- go to: https://github.com/MiDataInt/mdi-basic-training
- find and click “Fork” in the upper right corner
That’s it! You now have your own complete copy of this web page.
STEP #2 - Clone your fork using VS Code
Your fork of the repo is currently only on GitHub. You need to have a copy on your local computer so that you can edit it. To do this:
- Go to your fork on GitHub
- Click the big green ‘Code’ button
- Copy the link, i.e., https://github.com/YOUR_GIHUB_USERNAME/mdi-basic-training.git
- Open VS Code
- If you have a file or folder open, use ‘File’ to close it
- See: https://code.visualstudio.com/docs/editor/github#_cloning-a-repository
- Click the Source Control icon in the left sidebar
- Click ‘Clone Repository’
- Paste in the link you copied above
- Pick a folder where your clone will be stored
You will now have a local copy of your fork, ready to edit in VS Code.
STEP #3 - Edit a file in your clone
Take a minute to browse around the folders of the Basic Training repository. Can you find the file that has the text for this page?
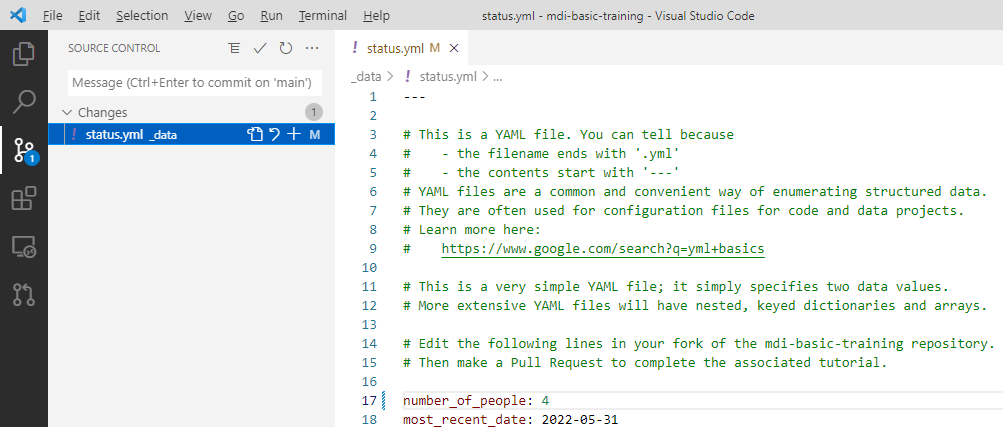
Then find the file _data/status.yml. Read the comments in the file to begin to understand how YAML files work (more on this later).
Finally, edit the file by incrementing ‘number_of_people’ up by one (the new person is you!) and changing ‘most_recent_date’ to today’s date. These are the changes you will send back up the chain. Save the file.
STEP #4 - Push the changes to your fork on GitHub
The changes you just made are currently only found on your local computer. To get them onto GitHub:
- Click the Source Control icon in the leftmost sidebar
- Find the “+” symbol for your Changes
- Click the “+” symbol, which will add, or stage, your changes
- Type a short message in the text box, e.g. “increment status.yml”
- Find and click the checkmark icon, which will commit your changes
- Click the “…” icon and find and click “Push”, which will push your changes to your fork of the repository on GitHub
To summarize, you just went through three basic actions in Git:
- “add”, i.e., stage, code changes for committing
- “commit” changes, with a short, descriptive message
- “push” changes from your local computer to GitHub
STEP #5 - Make a pull request on GitHub
The changes you just made are now on GitHub, but only in your fork. You are free to use them there however you’d like (e.g., you could run your own version of this web page).
However, we want to see your new change incorporated into the definitive MDI repository. To do that you need to make a “Pull Request”, which means you will ask the MDI maintainers to pull the change from your fork into the main repo.
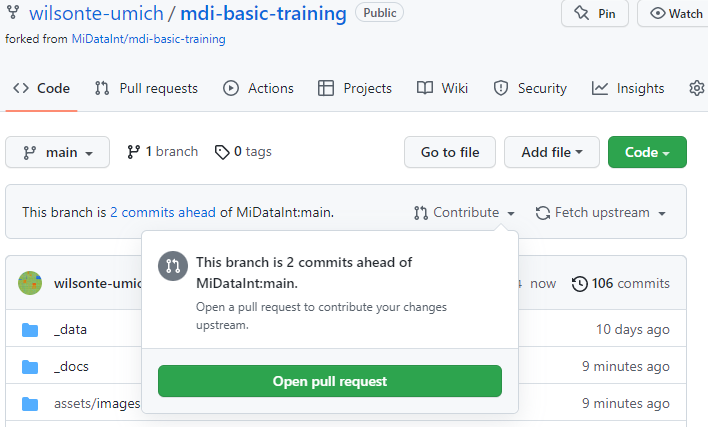
- Go to your fork of the Basic Training repository on GitHub
- Verify that you see the evidence of your recent commit
- Find and click the “Contribute” button
- Click the big green button labeled “Open Pull Request”
Note: you can also make the Pull Request from within VS Code.
STEP #6 - Wait for your changes to be accepted
Once an MDI maintainer reviews and merges your changes into the definitive repository, you will see evidence of them by reloading this web page:
Students should send their mentor an email once they’ve made the Pull Request.